
Setup
Example API
Our starting point will be a generic .NET 6 Web Api.
A simple barebone web API, which contains a weather forecast endpoint. In the example code, located on GitHub, I have separated the weather forecast generation into an own project. This is just to have a more realistic project structure, and Dockerfile.
The Dockerfile is created in the root of the project, and looks as follows:
# syntax=docker/dockerfile:1
FROM mcr.microsoft.com/dotnet/aspnet:6.0 AS base
WORKDIR /app
EXPOSE 80

ENV ASPNETCORE_URLS=http://+:80

FROM mcr.microsoft.com/dotnet/sdk:6.0 AS build

# Copy csproj and restore as distinct layers
WORKDIR /src
COPY ./src/*.sln ./
COPY ./src/Api/*.csproj ./Api/
COPY ./src/Service/webapi-in-docker-service/*.csproj ./Service/webapi-in-docker-service/
RUN dotnet restore

# Copy everything else and build
COPY ./src ./

WORKDIR /src/Api
RUN dotnet build -c Release -o /app/build --no-restore

FROM build AS publish
WORKDIR /src/Api
RUN dotnet publish -c Release -o /app/publish

FROM base AS final
WORKDIR /app
COPY --from=publish /app/publish .
ENTRYPOINT ["dotnet", "webapi-in-docker-app-service.dll"]
If you have worked with Docker, this file should be fairly familiar. We copy the project files, restore nuget packages, build and publish the app.
What is worth noticing is which port we expose, and ASP.NET URLs. We only expose port 80. We also ensure that the ASP.NET host responds to requests on the HTTP-protocol, not HTTPS. As we’re hosting the docker in Azure App Service, we have a layer in front of the container, which responds to HTTPS-requests. If we were to use HTTPS internally in the container as well, we would need to set up certificate forwarding. That in itself is a major hassle, and strictly speaking not required.
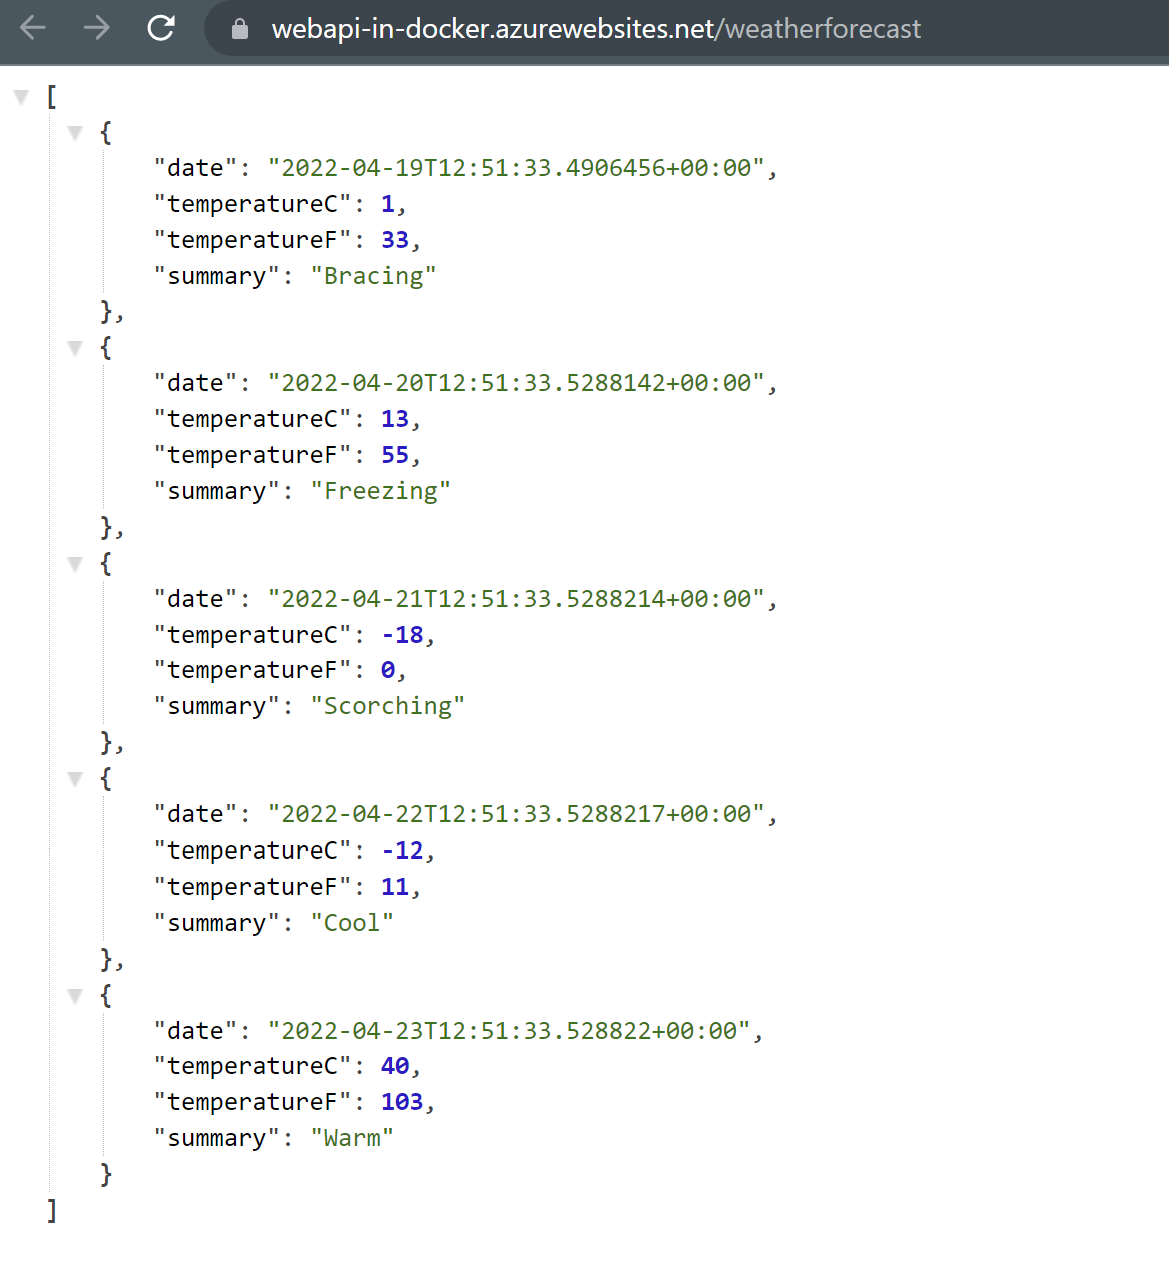
With the example app in place, you should be able to run it locally, as well as from a docker container. Either way, a GET call to the endpoint /weatherforecast should yield the following output:
Azure Services
Next we need to create our services in Azure. What we need is the following:
- Azure DevOps
- Azure Container Registry
- Azure App Service
As for Azure DevOps, I’m assuming you’re already familiar with it, and will not dive into any more details regarding it.
Azure Container Registry is required to store the Docker image built from the Docker file. This can be setup with the basic tier, and in a region near you. You should ensure that the property “Admin enabled” is set to true. This way you can get a username and password, which you’ll need later in the build pipeline.
The Azure App Service should be set up with the following settings:
- Docker Container as publish method
- Linux OS.
- Basic B-1 tier is sufficient for this example. You’ll adjust this according to your needs.
- You’ll need to specify the Azure Container Registry URL (which will be https://{YOURNAME}.azurecr.io), and the image name and tag. For now you can call input webapi:latest as the image name and tag, as this will be overwritten once we build and deploy.
Building and Deploying
Now that we have our resources, it is time to build and deploy our API through Azure DevOps. I’m assuming that you already have a team project setup to use with our build pipeline.
First you need to setup a service connection, to be able to connect to Azure. In the team project, navigate to Project Settings —> Service Connections. Click “New service connection” on the right hand corner. Setup a new service connection with Azure Resource Manager, selecting the subscription you want to access. If you have Azure Container Registry and the App Service within the same resource group, you can select this as well. Otherwise, the field for resource group should be left empty, to ensure you can reach the required resources. Also ensure you click “Grant access permission to all pipelines”, so that the pipeline we set up can utilize the service connection.
Next you need to setup a new build pipeline. I’m assuming that this is a known procedure, so just ensure you setup to build from a YAML file.
I will not go into great detail regarding the basic setup. For the example, the following is sufficient:
trigger:
  - main

pr: none

resources:
- repo: self

variables:
  - name: tag
    value: '$(Build.BuildId)'
  - group: 'Docker'
  - name: image_name
    value: '$(docker_registry)/webapi'
The two key takeaways is to note the tag variable, which will be used for tagging the Docker image. We also need to have a name for the Docker image. This is using the URL to Azure Container Registry, which is stored as a variable in the build pipeline.
Next, we will setup two stages. One to build and push the docker image, and one to deploy it.
stages:
- stage: Build
  displayName: Build image
  jobs:
  - job: Build
    displayName: Build
    pool:
      vmImage: ubuntu-latest
    steps:
    - checkout: self
      persistCredentials: "true"

    - task: Bash@3
      displayName: "Build, test and push docker image"
      inputs:
        targetType: 'inline'
        script: |
          docker login $(docker_registry) --username $(docker_username) --password $(docker_password)
          # build and push docker image
          docker build . -t '$(image_name):$(tag)' -t '$(image_name):latest'
          docker push '$(image_name):$(tag)'
          docker push '$(image_name):latest'
The build stage will run on the latest image of Ubuntu. First, we log in to the docker registry, using a username and password, which could be stored in the variable set for the build pipeline.
Next, we build the Docker file, and in this example, assuming it’s located in the root folder. We create two tags, one which is the current build tag, and one which is “latest”. The image name was specified in the variables, above.
Finally, we push both the latest version, and the tagged version, to Azure Container Registry.
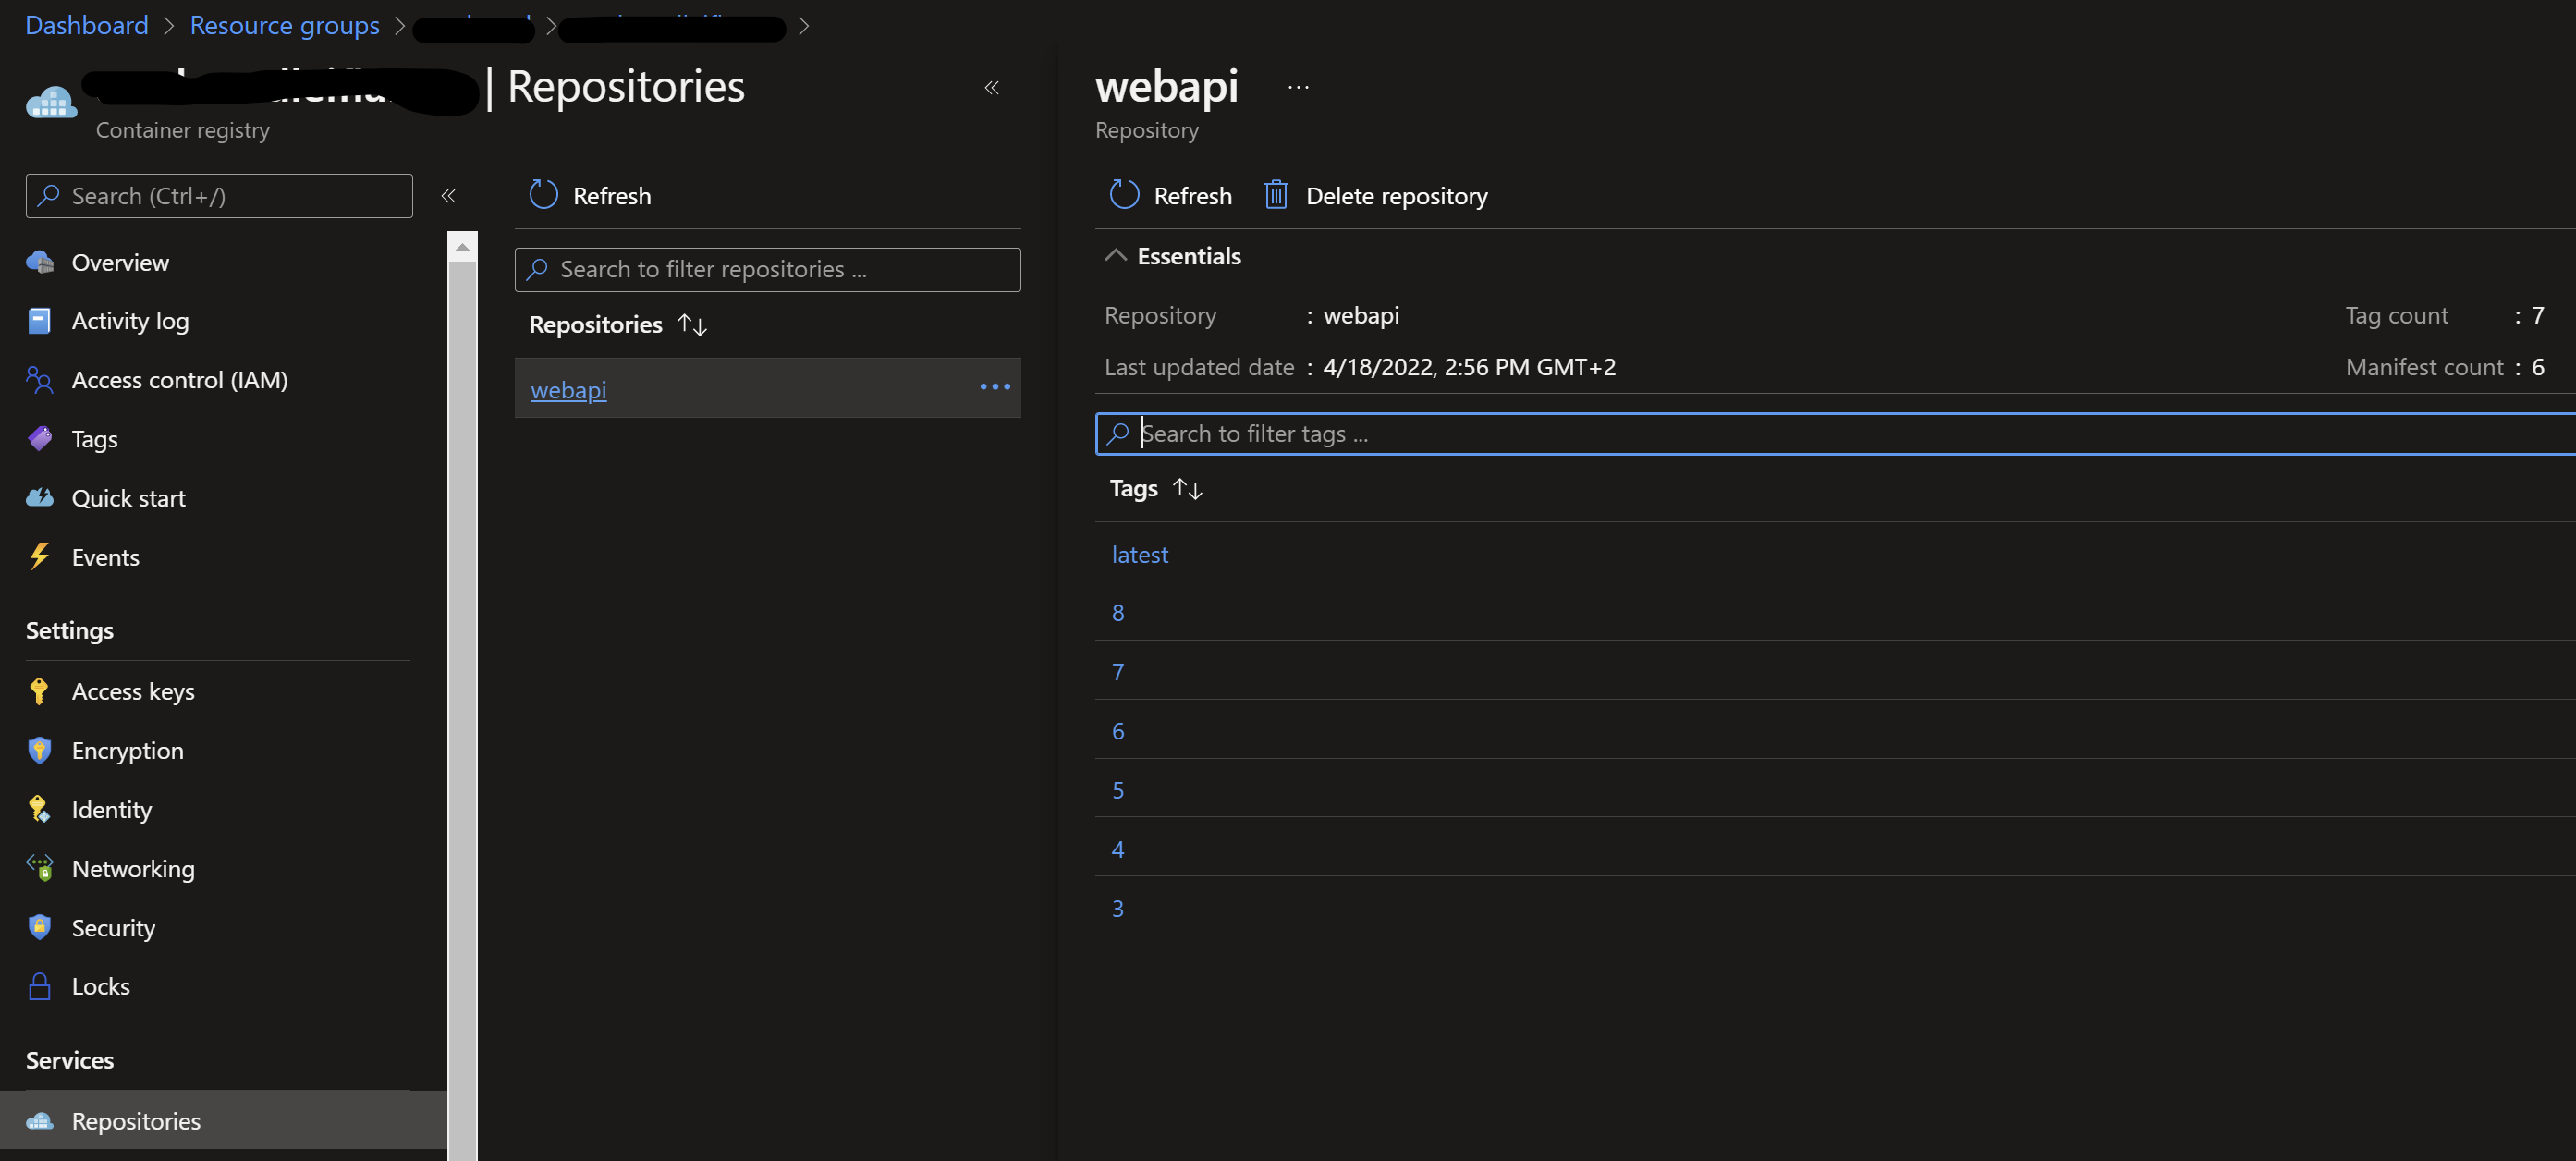
The pipeline can now be tested, and upon successful execution, you should be able to log in to Azure Container Registry, and see the Docker image uploaded.
The next stage is the deploy stage.
- stage: Deploy
  displayName: Deploy image
  jobs:
    - job: Deploy
      displayName: Deploy
      pool:
        vmImage: ubuntu-latest
      steps:
        - task: AzureRmWebAppDeployment@4
          inputs:
            ConnectionType: 'AzureRM'
            azureSubscription: '{SERVICE CONNECTION NAME}'
            appType: 'webAppContainer'
            WebAppName: 'webapi-in-docker'
            DockerNamespace: '$(docker_registry)'
            DockerRepository: 'webapi'
            DockerImageTag: '$(tag)'
As you can see, this step is also executing on the latest Ubuntu image. It contains one task, which is the Azure Web App Deployment task. It is using Azure Resource Manager as connection type, and you need to specify the service connection, created earlier, here. Further, you’ll need to specify the web app name, where to find the Docker image, and which tag to deploy.
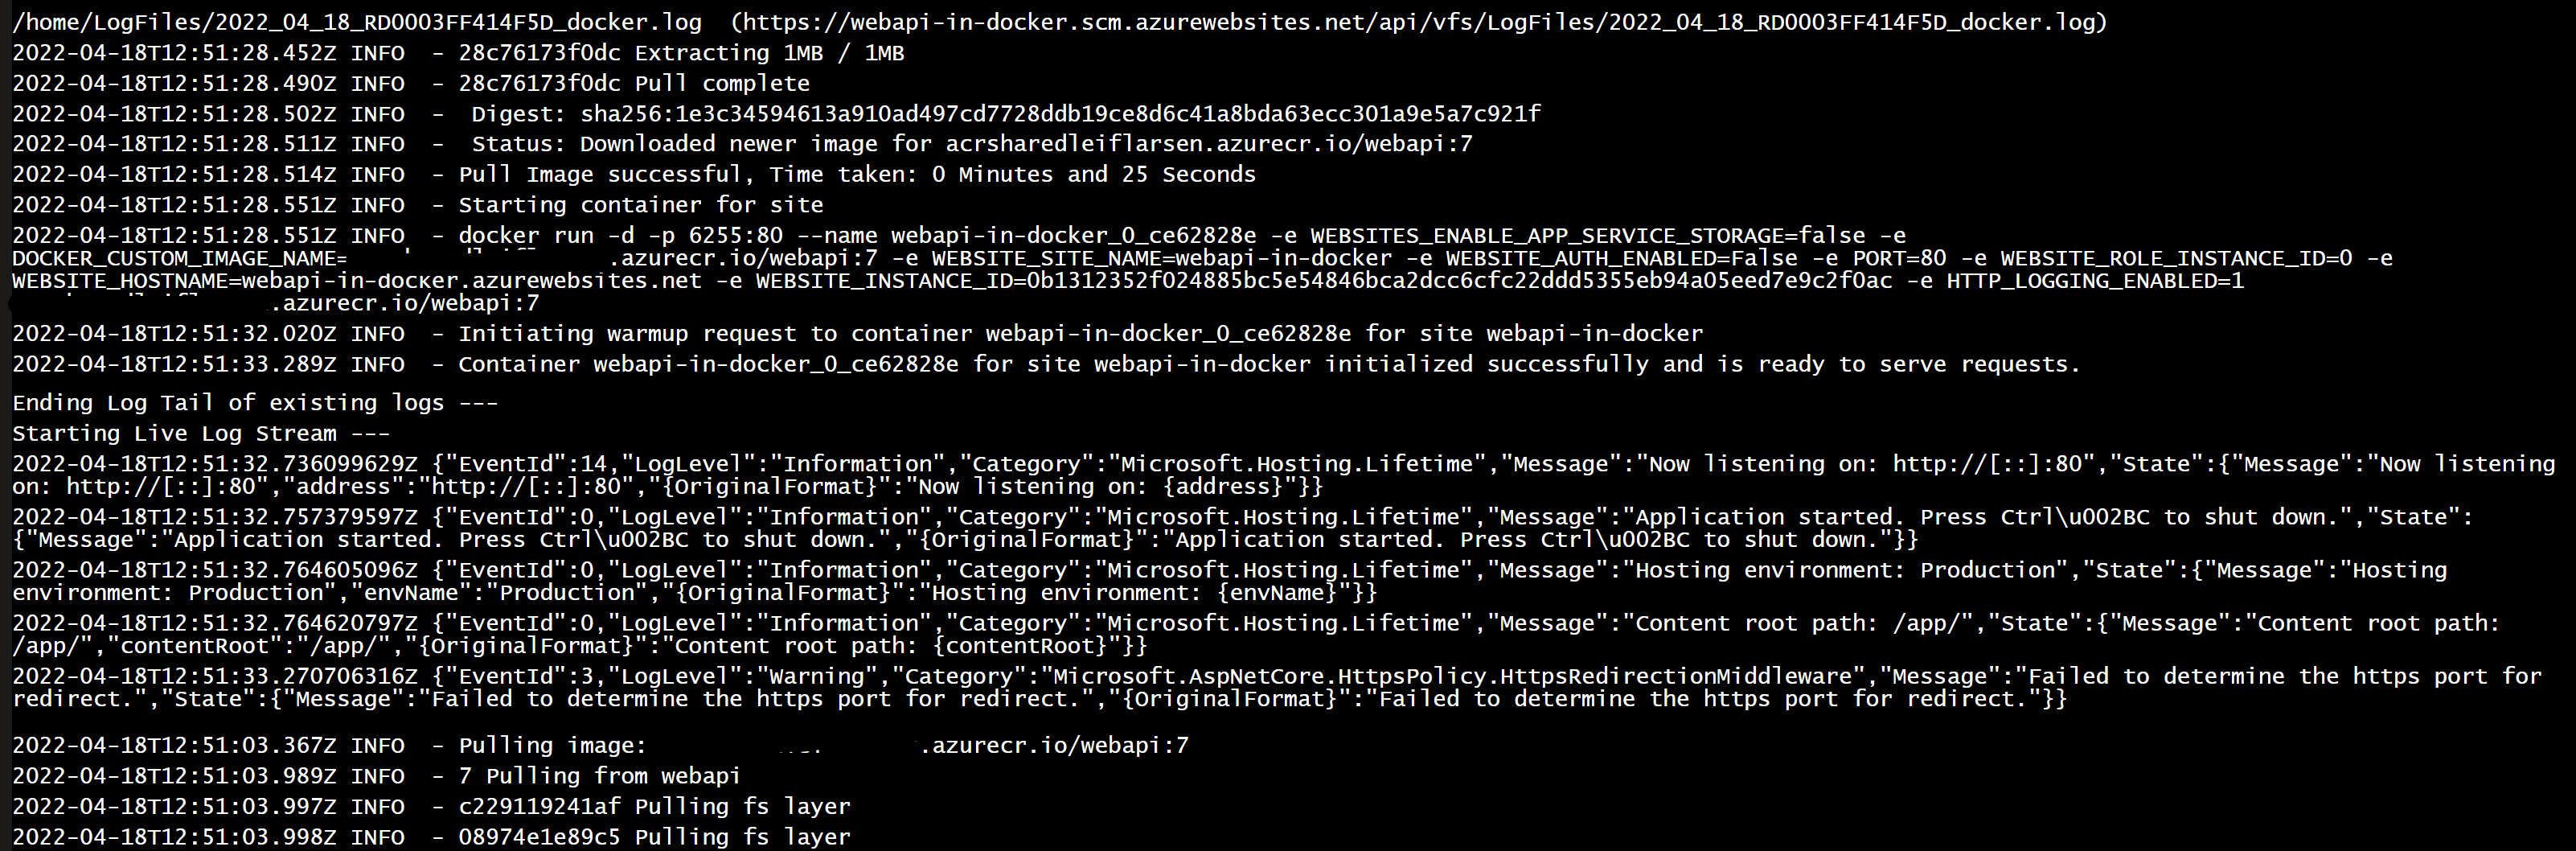
With this in place, the pipeline should be able to execute successfully. Once it has completed, you should be able to head over to the web app, on the /weatherforecast endpoint, and get similar results, as we saw above. You can also navigate to the log stream of the web app, and see that the Docker image is being retrieved and started. That can look similar to this:

Difficulties
Deploying and running a Docker container, using Azure App Service, was not without it’s difficulties. One of the big issues we struggled with, was the fact that it’s quite hard to get reasonable logs in error situations. Once deployed, you can always use App Services log stream, and other log providers you may use. But catching startup errors, configuration errors and similar was quite hard. In the end, there was a lot of trial and errors until we managed to run the API successfully.
Summary
In this post, we have seen how to setup a build and deploy pipeline in Azure DevOps, to be able to host a Docker container in Azure App Services. If you decide to go down this route, hopefully this guide will help you avoid a lot of headaches.