
In this post we’ll take a look at the File API, and dive a bit into how we can use it in order to make a simple and easy-to-understand user interface. We’ll start off by creating a general upload functionality with JavaScript and ASP.MVC3 (although MVC3 is not a requirement here, it’s just my preferred choice of architecture. Feel free to use Ruby, PHP, Sinatra or whatever you cup of tea might be.
HTML5 is already good on its way to become the web development standard we’ve been waiting for, and for once, the major browsers are working relentlessly to implement new features of the HTML5 specification with every new version. Chrome, Safari and Firefox are the most prominent browsers when it comes to HTML5 and CSS3 support, but with the release of IE9 and the upcoming IE10, Microsoft is also embracing the new standard. Unfortunately IE7 and 8 are both a lost cause, and legacy support will be necessary for their continued lifespan. I’ll cover legacy support in an upcoming post, but if you’re curious, you can check out the fabulous Modernizr JavaScript library.
What are we trying to achieve, and why?
The reasons for uploading files to a site can be many – uploading images to a gallery, uploading documents to a document library, uploading anything to anywhere just to share it with your friends, and so on. Currently we’re limited to the <input type=”file” /> element, which presents the user with a file-browser with single-file selection. The single file problem can be tackled by simply adding several input-elements, but it’s rarely a user-friendly method of uploading a bunch of files. In the light of JavaScript libraries such as jQuery, plugins have emerged to enable multiple file selection and uploading. The problem with these is that they often rely on a hidden Flash element to perform the actually selection and uploading. Once again we have a dependency to a third party framework, hence limiting certain platforms.
Enter HTML5 and the File API!
The File API is currently a working draft, just as the HTML5 specification is, and will probably stay like that for the better part of this decade. This doesn’t mean that you should stay away from it – on the contrary you should embrace it, because that’s the way it will improve and get better.
By utilizing the File API we get access to files, and information about them, on the client computer such as a Blob, Filelist and File.
Let’s get on with it already
I’ll presume you’ve worked a bit with JavaScript, HTML, CSS and ASP.NET MVC3 and I will not go in-depth on these topics.
Start with a blank slate
We’ll start by opening a new ASP.NET MVC3 Web project, leaving everything empty, and using Razor as the preferred View engine

I’m calling mine FileApiDemo
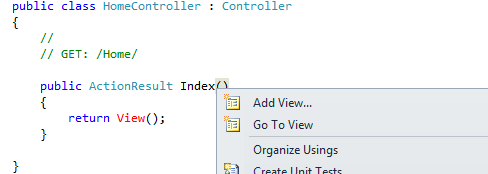
Let’s also add an empty controller that we’ll name HomeController, just to get the routes to work out of the box, and add a Viewpage for the Index Action. I’m also unchecking the masterpage option in this demo, to get the full HTML markup complete with Head and Body tags.
The markup
We’ll keep the markup simple, just defining a few tags, and most importantly the canvas tag that will work as our drop target for drag-drop operations.
<div id="page">
  <div class="html5upload" id="html5upload">
    <div id="drop-backdrop">
      <div class="text">Drag files here to upload</div>
      </div>
    <canvas id="drop-target"></canvas>
  </div>
</div>
I’ve added a few ids to the elements in order to access them easily with JavaScript and also some simple CSS. I also wrap all the elements in a div#page tag in order to center them nicely on the page. The CSS for the markup looks like this:
#page
{
    position: relative;
    width: 940px;
    height: 470px;
    margin: 0 auto;
}
#drop-backdrop, #drop-target
{
    position: absolute;
    width: 100%;
    height: 100px;
}
#drop-target
{
    border: 1px dashed #aaa;
}

#drop-backdrop
{
    color: #bbb;
    font-size: 20px;
}
#drop-backdrop .text
{
    width: 220px;
    margin: 40px auto 0 auto;
    position: relative;
}
This is mostly positional CSS, but with this in place the page should render like this in Google Chrome:

The JavaScript
The File API includes some events what we can attach handlers to, and in our case we’ll use one of these, namely Drop
First of let’s get the element into a variable for easy access later on:
var dropzone = document.getElementById('drop-target');
No point using jQuery selectors here, since we’re not currently interested in a jQuery object, and by using $(“#elementID”) we’re essentially doing the same as above.
Next up is the event listener. As I mentioned we want to trigger on a drop event, and once again we’ll use JavaScript native notation to achieve this:
dropzone.addEventListener('drop', function> (event) { },true);
We also have to intercept the dragover event to prevent the browser doing anything to interfere with our process:
dropzone.addEventListener('dragover', function(event) {
	event.preventDefault();
}, true);
If you’ve worked with jQuery or JavaScript before, this is familiar, but here is a more detailed explanation of the addEventListener method.
The first thing we want to do here is to call event.preventDefault() in the function, so that no one else interferes with our magnificent eventhandler J
dropzone.addEventListener('drop', function(event) {
	event.preventDefault();
    // Now we’re free to work uninterrupted!
}, true);
The event object passed into the method exposes a number of properties that could be useful, but in our case the really interesting property is event.dataTransfer
This in turn contains an array of files that we can access with the event.dataTransfer.files.
When we have the file-array we’re ready to access them and upload them. That’s exactly what we’ll do in this post.
I’ll pull this logic into a separate JavaScript method that I’ll call processFiles:
var processFiles = function (files) {
  for (var i = 0; i < files.length; i++) {
    var file = files[i];
    upload(file);
  };
}
In the upload function I’m simply going to enumerate over the array using a for..loop and upload each file asynchronously. Once again I’ll pull the actual upload logic to a separate method I’ll call upload:
var upload = function (file) {
  var xhr = new XMLHttpRequest();
  xhr.open('POST', '/home/upload', true);
  xhr.setRequestHeader('X-Filename', file.fileName);
  xhr.send(file);
}
The uploadmethod is going to create an XMLHttpRequest object to perform the actual transfer of the file. I’m also injecting the local filename as a Request header, so that I can access it from my controller action. Finally I’m sending the request with the options specified by xhr.open(). I’ve set up my connection to /home/upload as a POST action, and the third Boolean argument specifies that the request should be asynchronous.
If you’ve ever used $.getJSON, $.post or $.ajax in jQuery, this is basically the same JavaScript that is executed behind the scenes in the jQuery library.
The Controller code
I’ve added an action to my home-controller called Upload, and this should be familiar:
[HttpPost]
public ActionResult Upload(FormCollection form)
{
    string fileName = Request.Headers["X-Filename"];
    {
        string mappedFileName = Server.MapPath("~/App_Data/Files/" + fileName);
        if (System.IO.File.Exists(mappedFileName)) System.IO.File.Delete(mappedFileName);
        using (FileStream fs = new FileStream(mappedFileName, FileMode.CreateNew,
        FileAccess.ReadWrite))
        {
            byte[] fileRequest = new byte[Request.ContentLength];
            Request.InputStream.Read(fileRequest, 0, Request.ContentLength);
            fs.Write(fileRequest, 0, Request.ContentLength);
        }
        return null;
    }
}
I’m constraining it to Post with the [HttpPost] attribute, and from there it’s simple filewriting using the incoming Request.InputStream. As you can see, I’m also able to extract the filename from the Request.Headers[“X-Filename”];
Run the site now, and try and drag/drop files into the canvas container. Your files will magically appear in the App_data/Files folder (presuming that folder exists).
Legacy support
Unfortunately not all browsers support the File API yet. At the time of writing this post, the code so far should work in Chrome, Opera and Firefox as well as IE 10 (Source: http://caniuse.com/#search=File API). This is clearly not acceptable for a production ready environment, so let’s see how we can make a fallback that guarantees some sort of upload functionality in all major browsers.
First off, we need to add some markup.
<div class="html5upload" id="html5upload" style="display:none;">
    <div id="drop-backdrop">
        <div class="text">Drag files here to upload</div>
    </div>
    <canvas id="drop-target"></canvas>
</div>
<div class="legacy-upload" id="legacyUpload" style="display:none;">

<form method="post" enctype="multipart/form-data" action="/home/upload">

<h2>Select some files to upload</h2>

<p><input id="file-01" name="file-01" type="file" /></p>

<p><input id="file-02" name="file-02" type="file" /></p>

<p><input id="file-03" name="file-03" type="file" /></p>

<p><input id="file-04" name="file-04" type="file" /></p>

<p><input type="submit" value="Upload!" /></p>

</form>

</div>
All we’re doing is adding a simple form with some standard fileuploaders and a submitbutton wrapped in a div with Id “legacyUpload”, and I’ve also set both upload divs to display:none, to make sure the JavaScript handles displaying and hiding of the elements.
Fixing the JavaScript
What we need to check in order to make sure we have the support we need in the browser is simply to add an if-block around our code:
if (window.File) { (...) [the JavaScript you already have goes here] } else {}
If you run the project in a legacy browser (IE7 or IE8 for instance), you’ll see that the page is empty. This is because we’re not displaying anything. Let’s fix that
First off, let’s store our two uploadwrappers in some variables. We’ll do that immediately before the if-statement:
// Get both upload-elements upfront.
var html5upload = document.getElementById("html5upload");
var legacyUpload = document.getElementById("legacyUpload" );
// this will make sure the browser is able to handle
// the parts of the File API that we require
if (window.File) {
	// By using regular JavaScript, we can now easily manipulate the style-attribute on our divs, like so:
	legacyUpload.style.display = 'none';
	html5upload.style.display = 'block';
}
else
{
// And – you guessed it – the inverse in the else-block:
	legacyUpload.style.display = 'block';
	html5upload.style.display = 'none' ;
}
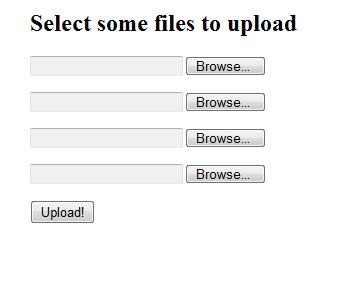
Refreshing the legacy browser should now display something like this:
If you attempt to select some files and upload them, you will unfortunately get some errors in the action code, so we’ll have to make a few adjustments there as well.
When uploading synchronously with a <form> the request populates the Request.Files object, so we’ll need to read that instead of the InputStream that is directly on the Request object
I’ve rewritten and refactored the controller code to look like this (I’m explaining the changes after the code):
    [HttpPost]
    public ActionResult Upload(FormCollection form)
    {
        if (Request.Files != null && Request.Files.Count > 0)
        {
            // Legacy - This method is call synchronously for all files in one go,
            // so we enumerate all file-fields and save them.
            // Obviously, the browser will have to wait for this method to finish before returning
            // focus to the user.
            foreach (string fileId in Request.Files)
            {
                var file = Request.Files[fileId];
                Save(file);
            }
            // We'll just send the user back to wherever the request came from
            // For good practice we'll check if the referrer is null (which it will be if we're running https)
            // if that's the case we'll throw the user back to the Index action
            if (Request.UrlReferrer != null) return Redirect(Request.UrlReferrer.ToString());
            return RedirectToAction("Index");
        }
        // if we got this far, this is not legacy :)
        // In cases of the Html5 upload this method will be called once for each file we upload
        string fileName = Request.Headers["X-Filename"];
        Save(fileName, Request.ContentLength, Request.InputStream);
        // This is asynchronous, so we could potentially return some JSON data
        // but since we're not checking the response in JavaScript, we'll stick with null for now.
        // Potential errors related to saving the file should be reported back here.
        return null;
    }
    private void Save(HttpPostedFileBase file)
    {
        Save(file.FileName, file.ContentLength, file.InputStream);
    }
    private void Save(string fileName, int contentLength, Stream inputStream)
    {
        // We need to perform a check to see if we actually received any content here
        // In the case of Legacy upload in this example, all fileobjects may not be populated,
        // so we only save the file if it has a filename and its contentlength is larger than 0 bytes.
        if (!String.IsNullOrEmpty(fileName) && contentLength > 0)
        {
            string mappedFileName = Server.MapPath("~/App_Data/Files/" + fileName);
            if (System.IO.File.Exists(mappedFileName)) System.IO.File.Delete(mappedFileName);
            using (var fs = new FileStream(mappedFileName, FileMode.CreateNew,
            FileAccess.ReadWrite))
            {
                var fileRequest = new byte[contentLength];
                inputStream.Read(fileRequest, 0, contentLength);
                fs.Write(fileRequest, 0, contentLength);
            }
        }
    }
First off, we check if the Request.Files object is empty which will indicate whether or not this is a legacy request. If this is a legacy upload, we traverse the Request.Files list and pass each file to the Save method. I’ve extracted the Save functionality out to a separate method, so that I can reuse the method for both legacy and non-legacy uploads. This should be pretty self-explanatory, and I’ve also added a bunch of comments to explain the different parts of the code.
Cool!
So there you have it. Compile, run, upload, and you’ll have a fully working upload page in all major browsers.
Legacy browsers will not get the awesome drag and drop functionality, but will still have the opportunity to upload some files – which is better than nothing, right? J
So what’s next?
In this post I’ve shown you how you can make a nice and modern drag and drop upload page, with a pretty basic legacy fallback. We’ve done this by utilizing the File API that is implemented by some of the newer browsers, and not a single line of jQuery code. I find it is important to know a bit about the inner workings of JavaScript before blindly throwing yourself at jQuery (By no means should you be a master of JavaScript in order to use jQuery. It just helps to know a bit about the mechanics behind it)
In an upcoming Part 2, we’ll take this a bit further focusing on the File API part of the upload, and we’ll look at adding some more eye-candy in the form of progressbars, cancellation and live preview of the uploaded files. We’ll also implement file filters, so that users are limited to what type of files they can upload.
Hope you enjoyed this post, and stay tuned for more!