
App Roles is a new feature available for the applications registered in Microsoft Entra ID. They can be easily defined and assigned to users, (client) apps and groups.
The App Roles assigned to a user or group will be present in the Role Claims of the id/access token. During the authorization phase the token is checked for the required role claims.
These new role claims are not meant to replace or exclude group claims. In fact you can combine them both if you need for a finer grained access control.
Creating an App Role
There are 3 ways to define app roles:
- Using the Azure Portal
- Using the Graph API
- Using az cli
In this post we will not cover the last 2 and will only focus on using the Azure Portal. Follow following steps to create an App Role.
Create an app
- In Azure Portal find Microsoft Entra ID -> App registrations (under Manage)
- Click on Add -> App registration
- Give it a name (mine will be alex-api-app)
- Select the first option - Accounts in this organizational directory only
- Click Register
- Make sure that you are added as the application owner after the app is created. You will find this under Manage -> Owners. If you are not there click on Add owners and add yourself.
Define an app role for users
- In Azure Portal find Microsoft Entra ID -> App registrations (under Manage)
- Find and click on your app on the list
- Find the App roles blade under Manage and click on it
- Click on Create app role on the top

- Write a display name for the app role. This has to be human readable, it will not be passed with the token
- Select Users/Groups
- Set the value to "Read_users" (this will show up in the token) and add a description.
- Make sure the checkbox for "Do you want to enable this app role?" is checked otherwise will not be able to assign the role to a user.
Note: You can choose "Both" for the Allowed member types, meaning that you will be able to assign the same role to both users and apps. I prefer to separate them so that I can deactivate a role for one type without affecting the other. This way I am also sure that it is not possible for a rogue user or app to still access the resources I want to protect.
Note 2: You can set the value to what you wish but I prefer to also make it easier to distinguish between user and app roles in code. You might need only user roles right now but apps and requirements evolve over time and at some point you might need a role for apps as well. Using a prefix or suffix to point the member type is a good way to ensure that you don't end up with something like this:
[Authorize(Roles = "Reader, Reader_apps")]
Go ahead and create a new role for apps only using the steps as above. Give it a new name and select Applications at number 6. In the end you should have something like this:

Assigning user roles
Assigning a role to a user is done from the Enterprise Applications section in Microsoft Entra ID. You can navigate to the corresponding enterprise application from the Overview blade:
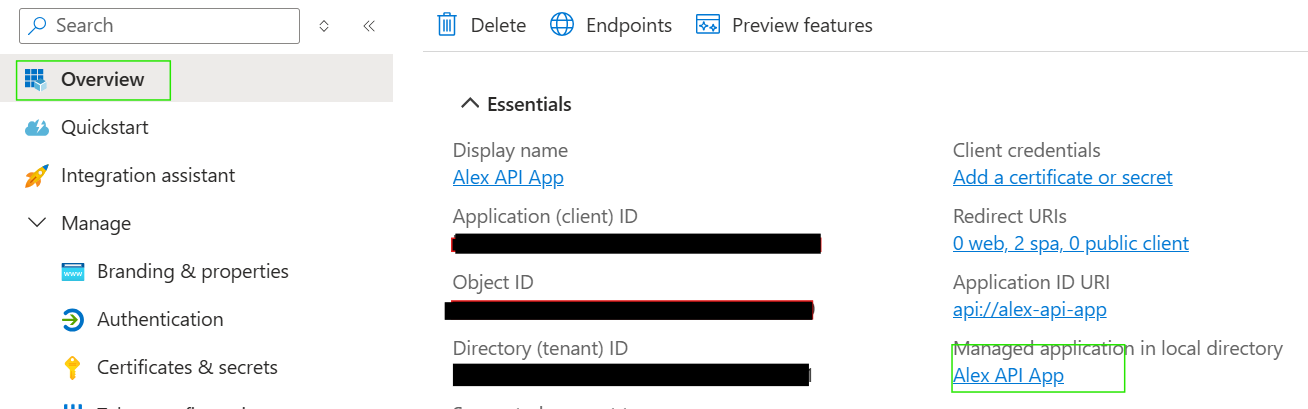
In the Enterprise Application follow these steps:
- Click on Users and groups under Manage
- Click on Add user/group
- Select the user you want to assign the role to
- Assign the role (if you only have one role available it will be selected by default)
- Assign
You can now decorate your code with the Authorize attribute:
[Authorize(Roles = "Reader_users")]
Tip! Using the Authorize attribute with comma separated roles means that the authorization process will check that at least 1 of the roles is present on the token:
[Authorize(Roles = "role1,role2,role3")]
Using several attributes under another will be interpreted as "all roles are required for access":
[Authorize(Roles = "role1")]
[Authorize(Roles = "role2")]
Tip 2! You might want to check out the Policy-based Authorization in ASP.NET Core for better and easier management of the authorization requirements.
Assigning app roles
Assigning roles to an app is a little different process.
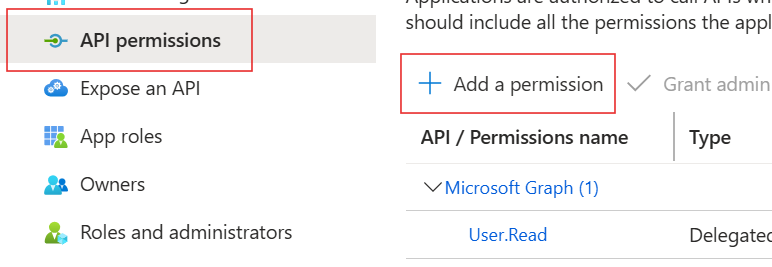
You need to find the client app that needs to access the api in Microsft Entra ID in App registrations.
Open API permissions under Manage and click on Add a permission:
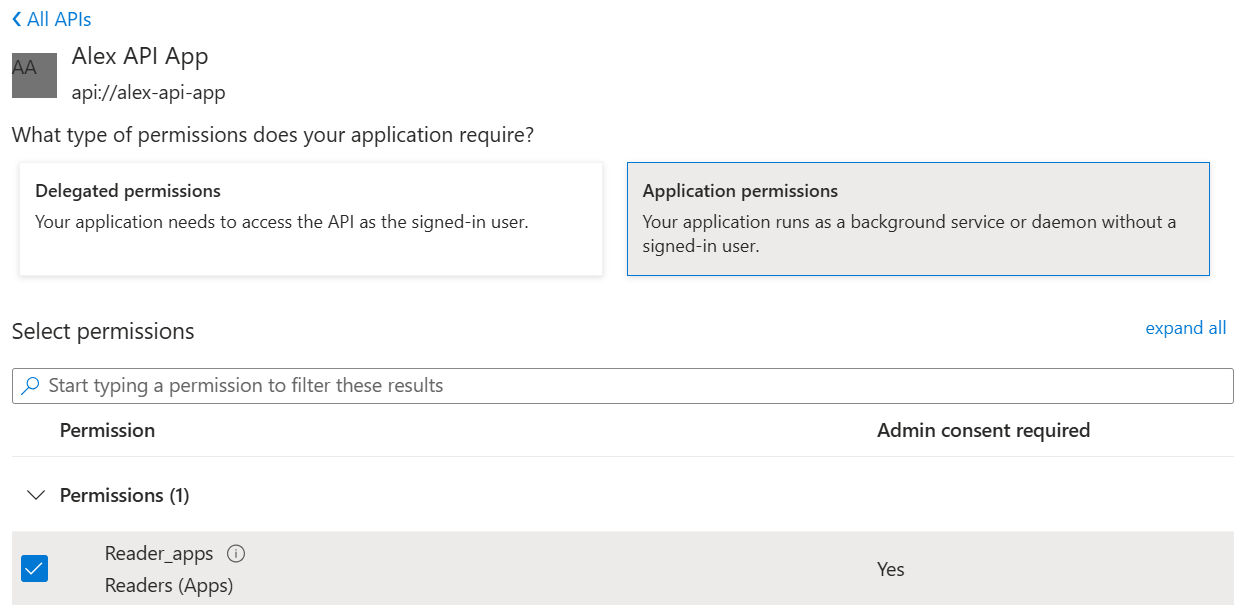
In the blade that opens choose My APIs and then click on the API that you want to request access to.
You will be presented with a new choice: Delegated permissions or Application permissions. Since we want to assign the roles that the API exposes for apps only, we choose Application permissions. From there we check the roles that we want to receive:
Since the client app will run without a user signed in you will have to use the client credentials flow to obtain the token.
Conclusion / Summary
In this post we saw how to create and assign App Roles to users, groups or apps.
App Roles can simplify the authorization process for your application and also the user management in Microsoft Entra ID since you do not longer need to create special groups for authorization requirements.