
This is a basic example of how to write your first automated UI-test using C#, Visual Studio 2017 and the NUnit Framework (xUnit can also be used). The purpose of this blog post is to give you a clean and easy example to get started with UI testing.
For implementation this blog post will be using Selenium and SpecFlow. Details can be found on their respective web sites:
- Selenium automates the browser (website)
- SpecFlow defines, manages and executes human-readable test scripts (website).
Just here for the source code?
https://github.com/novanet/Selenium
Why you should UI-test?
End-to-end with Selenium: Why you should UI-test
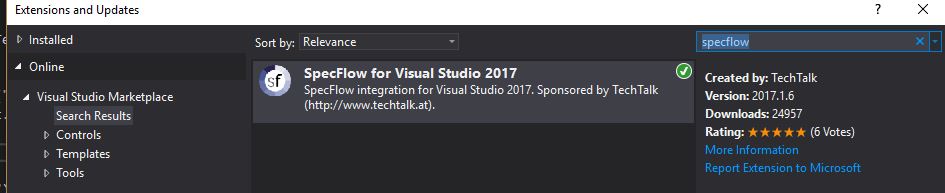
1. Install the SpecFlow extension for Visual Studio
2. Create a new Unit test project in Visual Studio
Create folders for:
- Features (test scripts)
- Infrastructure (web driver, setup etc.)
- Steps (logic)
NB! Creating these folders are optional, but it's how I like to structure the main parts of the tests. Further structuring is not covered in this blog post.
3. Install NuGet packages
Install the following NuGet packages:
- Selenium.WebDriver
- Selenium.Support
- SpecFlow
Also install NUnit if not already present. For Visual Studio 2017, NUnit3TestAdapter is required.
4. Download ChromeDriver
In the Infrastructure folder, create a folder called "ChromeDriver", download and add the ChromeDriver.exe with "Copy always" flag.
5. Setting up the Selenium WebDriver
This class acts as the web driver provider (the magic that opens and manages the browser), returning an instance of the Chrome web driver based on the Chrome driver exe file. After the test is finished the instance is killed.
The Chrome web driver supports a range of options, for example it can run in incognito mode if you want to avoid browser caching. For this simple test the option of starting the window maximized is set.
[Binding]
public static class WebDriver
{
    private static IWebDriver _instance;

    public static IWebDriver Current => _instance ?? (_instance = GetChromeDriver());

    private static IWebDriver GetChromeDriver()
    {
        Directory.SetCurrentDirectory(TestContext.CurrentContext.TestDirectory);

        var service = ChromeDriverService.CreateDefaultService(Path.GetFullPath(@"Infrastructure\ChromeDriver\"));

        var options = new ChromeOptions();
        options.AddArguments("--start-maximized");

        return new ChromeDriver(service, options);
    }

    [AfterTestRun]
    public static void Kill()
    {
        if (_instance == null)
            return;

        try
        {
            _instance.Manage().Cookies.DeleteAllCookies();
        }
        finally
        {
            _instance.Quit();
        }
    }
}
Selenium supports a wide range of web drivers, including Firefox, Internet Explorer, Safari, Remote and PhantomJS. This enables the search for browser specific bugs, or you can go headless for faster execution.
6. Add steps
Steps ties the test script to code. Here you can do almost anything; check the database, send events, navigate to URL's etc.
Steps can be reused in different test scripts. Making a toolbox of easy-to-use, generic steps will make the job of writing test scripts much faster later on.
Structurewise, for this simple test the three steps used are placed in the same file. When more steps are required these should be separated into several files by functionality or feature.
For this simple test, the code is self-explanatory:
[Binding]
public class Steps
{
    [Given(@"I navigate to ""(.*)""")]
    public void NavigateTo(string url)
    {
        WebDriver.Current.Navigate().GoToUrl(url);
    }

    [When(@"I click the link ""(.*)""")]
    public void ClickTheLink(string linkText)
    {
        WebDriver.Current
                .FindElements(By.TagName("a"))
                .First(element => element.Text == linkText)
                .Click();
    }

    [Then(@"the text ""(.*)"" is visible")]
    public void TheTextIsVisible(string text)
    {
        Assert.That(WebDriver.Current.PageSource.Contains(text), Is.True);
    }
}
####7. Add test script using SpecFlow
Finally, the actual test is written. The test is comprised by the generic steps defined in #6.
Under the features folder, add new item -> "SpecFlow Feature file".
The name of the file should be the feature you are testing, in this case "Employee.feature".
The SpecFlow feature file describes a unique scenario. The test is structured by the conditions Given, When and Then, like the arrange-act-assert-pattern. These conditions should always be ordered this way, a When should never come after a Then. If there are more than one condition, the next line should start with And.
This simple test navigates to the Novanet homepage, to the employees page and checks that my name is there:
Feature: Employees

Scenario: Hallstein is employed
	Given I navigate to "https://www.novanet.no"
	When I click the link "MENNESKENE"
	Then the text "Hallstein Brøtan" is visible
####8. Run the test The SpecFlow extension to Visual Studio enables the option to run the specflow scenarios.
Right-click the "Employee.feature"-file in Solution Explorer and the option "Run SpecFlow Scenarios" (click image to view full screen):

####9. Source code The source code for this basic example can be found here: https://github.com/novanet/Selenium